takaya030の備忘録

PHP、Laravel、Docker などの話がメインです

Vagrant で ubuntu 20.04 + Docker 環境構築

VagrantVirtualBoxubuntu 20.04 の VM を構築したときの手順メモ

検証環境

Windows10 Home Edition (version 21H1)

chocolatey のインストール

こちらのサイトからインストールします
自分は PowerShell のインストールコマンドでインストールしました

chocolatey.org

Windows のソフトのインストール

PowerShell を管理者として実行
chocolatey で VirtualBoxvagrant、docker-cli、docker-compose をインストールする

PS D:\> choco install -y virtualbox
PS D:\> choco install -y vagrant
PS D:\> choco install -y docker-cli
PS D:\> choco install -y docker-compose

インストールが完了したら各ツールの動作確認

D:\>vagrant version
Installed Version: 2.2.18
Latest Version: 2.2.18

You're running an up-to-date version of Vagrant!

D:\>docker -v
Docker version 19.03.12, build 0ed913b8-

D:\>docker-compose -v
docker-compose version 1.29.2, build 5becea4c

vagrantプラグインのインストール

D:\>vagrant plugin install vagrant-disksize
D:\>vagrant plugin install vagrant-vbguest
D:\>vagrant plugin install vagrant-docker-compose

インストールされたか確認

D:\>vagrant plugin list
vagrant-disksize (0.1.3, global)
vagrant-docker-compose (1.5.1, global)
vagrant-vbguest (0.30.0, global)

Vagrantfile の作成

作業用ディレクトリを作成して vagant init を実行します

D:\>mkdir vagrant\focal64

D:\>cd vagrant\focal64

D:\vagrant\focal64>vagrant init ubuntu/focal64

作成された Vagrantfile を下記の内容に変更します。

# -*- mode: ruby -*-
# vi: set ft=ruby :

Vagrant.configure("2") do |config|

  config.vm.box = "ubuntu/focal64"

  config.vm.box_check_update = false

  config.vm.network "private_network", ip: "192.168.33.11"

  config.vm.provider "virtualbox" do |vb|
    # Display the VirtualBox GUI when booting the machine
    vb.gui = true
  
    # Customize the amount of memory on the VM:
    vb.memory = "2048"
  end

  config.vm.provision :docker
  config.vm.provision :docker_compose, compose_version: "1.29.2"

  config.vm.provision "shell", inline: <<-SHELL
    apt-get update -y

    gpasswd -a vagrant docker

    mkdir -p /etc/systemd/system/docker.service.d
    touch /etc/systemd/system/docker.service.d/options.conf
    echo '[Service]' > /etc/systemd/system/docker.service.d/options.conf
    echo 'ExecStart=' >> /etc/systemd/system/docker.service.d/options.conf
    echo 'ExecStart=/usr/bin/dockerd -H unix://' >> /etc/systemd/system/docker.service.d/options.conf

    touch /etc/docker/daemon.json
    echo '{"log-driver":"json-file","log-opts":{"max-size":"10m","max-file":"3"}}' > /etc/docker/daemon.json
    chmod 600 /etc/docker/daemon.json

    systemctl daemon-reload
    systemctl restart docker

    if [ ! -d "/home/vagrant/google-cloud-sdk" ]; then
      curl https://sdk.cloud.google.com > /tmp/install.sh
      sudo -u vagrant -i bash /tmp/install.sh --disable-prompts --install-dir=/home/vagrant
      sudo -u vagrant -i echo '# The next line updates PATH for the Google Cloud SDK.' >> /home/vagrant/.bashrc
      sudo -u vagrant -i echo 'if [ -f '\\''/home/vagrant/google-cloud-sdk/path.bash.inc'\\'' ]; then . '\\''/home/vagrant/google-cloud-sdk/path.bash.inc'\\''; fi' >> /home/vagrant/.bashrc
      sudo -u vagrant -i echo '# The next line enables shell command completion for gcloud.' >> /home/vagrant/.bashrc
      sudo -u vagrant -i echo 'if [ -f '\\''/home/vagrant/google-cloud-sdk/completion.bash.inc'\\'' ]; then . '\\''/home/vagrant/google-cloud-sdk/completion.bash.inc'\\''; fi' >> /home/vagrant/.bashrc
      rm -vf /tmp/install.sh
    fi
  SHELL
end

仮想マシンの起動

vagrant up仮想マシンを起動します

D:\vagrant\focal64>vagrant up

vagrant ssh仮想マシンにログインします。

D:\vagrant\focal64>vagrant ssh

Docker の動作確認

プロビジョニングが正常に実行されていれば docker コマンドが使用可能になっています

vagrant@ubuntu-focal:~$ docker -v
Docker version 20.10.8, build 3967b7d

vagrant@ubuntu-focal:~$ docker-compose -v
docker-compose version 1.29.2, build 5becea4c

vagrant@ubuntu-focal:~$ docker run --rm hello-world
Unable to find image 'hello-world:latest' locally
latest: Pulling from library/hello-world
b8dfde127a29: Pull complete
Digest: sha256:7d91b69e04a9029b99f3585aaaccae2baa80bcf318f4a5d2165a9898cd2dc0a1
Status: Downloaded newer image for hello-world:latest

Hello from Docker!
This message shows that your installation appears to be working correctly.

To generate this message, Docker took the following steps:
 1. The Docker client contacted the Docker daemon.
 2. The Docker daemon pulled the "hello-world" image from the Docker Hub.
    (amd64)
 3. The Docker daemon created a new container from that image which runs the
    executable that produces the output you are currently reading.
 4. The Docker daemon streamed that output to the Docker client, which sent it
    to your terminal.

To try something more ambitious, you can run an Ubuntu container with:
 $ docker run -it ubuntu bash

Share images, automate workflows, and more with a free Docker ID:
 https://hub.docker.com/

For more examples and ideas, visit:
 https://docs.docker.com/get-started/

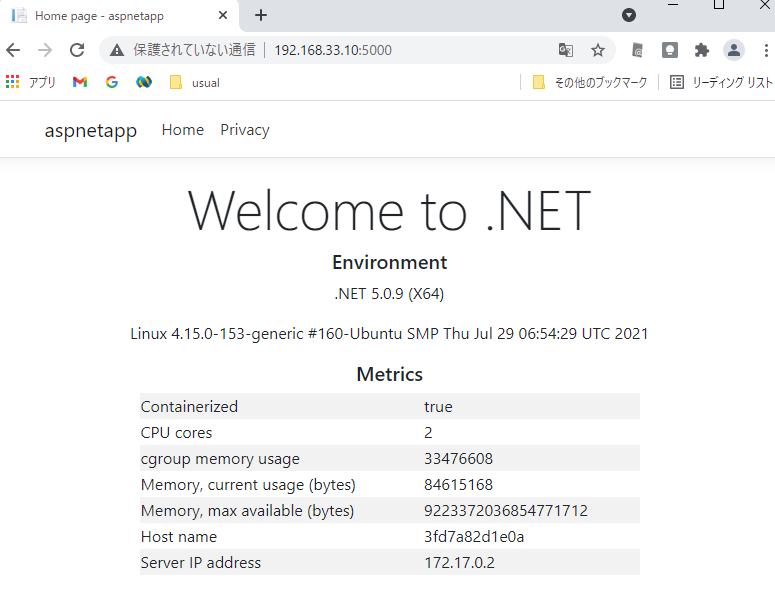
Windows からのリモート接続の確認

Windows の docker コマンドが ubuntu の docker エンジンにリモート接続可能か確認します

D:\>set DOCKER_HOST=tcp://192.168.33.11:2375

D:\>docker images
REPOSITORY          TAG                 IMAGE ID            CREATED             SIZE
hello-world         latest              d1165f221234        6 months ago        13.3kB

D:\>docker run --rm hello-world

Hello from Docker!
This message shows that your installation appears to be working correctly.

To generate this message, Docker took the following steps:
 1. The Docker client contacted the Docker daemon.
 2. The Docker daemon pulled the "hello-world" image from the Docker Hub.
    (amd64)
 3. The Docker daemon created a new container from that image which runs the
    executable that produces the output you are currently reading.
 4. The Docker daemon streamed that output to the Docker client, which sent it
    to your terminal.

To try something more ambitious, you can run an Ubuntu container with:
 $ docker run -it ubuntu bash

Share images, automate workflows, and more with a free Docker ID:
 https://hub.docker.com/

For more examples and ideas, visit:
 https://docs.docker.com/get-started/

参考サイト

takaya030.hatenablog.com

qiita.com

qiita.com

www.vagrantup.com

qiita.com

dockerlabs.collabnix.com

docs.docker.jp

変更履歴

Docker で ASP.NET Core 5.0 を動かす

VagrantVirtualBox に構築した ubuntu 18.04 + Docker 環境で ASP.NET Core 5.0 を動かしたときの手順メモ

検証環境

# Host OS
Windows10 Home Edition
VirtualBox 6.1.22
Vagrant 2.2.16

# Guest OS
ubuntu 18.04.5 LTS (Bionic Beaver)
Docker version 20.10.7, build f0df350

サンプルアプリのダウンロード

マイクロソフトが公開している dotnet-docker のサンプルをダウンロードします。

$ git clone https://github.com/dotnet/dotnet-docker

ビルドと実行

$ cd dotnet-docker/samples/aspnetapp
$ docker build -t aspnetapp .
$ docker run -it --rm -p 5000:80 --name aspnetcore_sample aspnetapp

動作確認

http://<GuestOSのIP>:5000 を WEB ブラウザで開いて以下の画面が表示されれば成功です。 f:id:takaya030:20210828182357p:plain

参考サイト

docs.microsoft.com

ubuntu 18.04 に gcloud をインストール

VagrantVirtualBox に構築した ubuntu 18.04 環境に gcloud をインストールしたときの手順メモ

検証環境

Windows10 Home Edition
VirtualBox 6.0.18
Vagrant 2.2.9

C:\>vagrant box list
ubuntu/bionic64   (virtualbox, 20200916.0.0)

gcloud コマンドのインストール

以下の Google のサイトに記載されていた手順でインストールできました。

cloud.google.com

ホームディレクトリで以下のコマンドを入力します。

$ curl -O https://dl.google.com/dl/cloudsdk/channels/rapid/downloads/google-cloud-cli-389.0.0-linux-x86_64.tar.gz
$ tar -xf google-cloud-cli-389.0.0-linux-x86_64.tar.gz
$ ./google-cloud-sdk/install.sh
$ source .bashrc

SDK の初期化

下記のコマンドで SDK を初期化します。

$ gcloud init --console-only

gcloud 認証情報ヘルパー

docker コマンドで Container Registry へイメージの push/pull を可能にするため認証情報ヘルパーを設定します。

下記のコマンドでユーザー認証情報から認証を構成します

$ gcloud auth login

次のコマンドで Docker を構成します。

$ gcloud auth configure-docker

$HOME/.docker/config.json に認証情報が保存されます。

動作確認

Container Registry へ push したいイメージを下記のようにタグ付けします
(gcr.io はプッシュ先レジストリのホストネーム)
(TAG を省略した場合は latest になる)

$ docker tag SOURCE_IMAGE gcr.io/PROJECT_ID/IMAGE:TAG

下記コマンドで push します

$ docker push gcr.io/PROJECT_ID/IMAGE:TAG

参考サイト

cloud.google.com

cloud.google.com

cloud.google.com

Vagrant で ubuntu 18.04 + Docker 環境構築

VagrantVirtualBoxubuntu 18.04 の VM を構築したときの手順メモ

検証環境

Windows10 Home Edition
VirtualBox 6.0.18
Vagrant 2.2.9

Vagrant Box ファイル追加

vagrant box add コマンドで ubuntu 18.04 の Box ファイルを追加します。

C:\>vagrant box add ubuntu/bionic64

vagrant box list コマンドで Box ファイルが追加されているか確認可能です。

C:\>vagrant box list
ubuntu/bionic64   (virtualbox, 20200916.0.0)

Vagrantfile の作成

作業用ディレクトリを作成して vagant init を実行します。

D:\>mkdir vagrant\ubuntu

D:\>cd vagrant\ubuntu

D:\vagrant\ubuntu>vagrant init ubuntu/bionic64

作成された Vagrantfile を下記の内容に変更します。
仮想マシンのメモリを 2014MB にしています。
プロビジョニングでは Docker 関連のセットアップを行っています。

--- a/Vagrantfile Mon Sep 21 18:01:11 2020
+++ b/Vagrantfile Mon Sep 21 18:49:46 2020
@@ -32,7 +32,7 @@

   # Create a private network, which allows host-only access to the machine
   # using a specific IP.
-  # config.vm.network "private_network", ip: "192.168.33.10"
+  config.vm.network "private_network", ip: "192.168.33.10"

   # Create a public network, which generally matched to bridged network.
   # Bridged networks make the machine appear as another physical device on
@@ -49,13 +49,13 @@
   # backing providers for Vagrant. These expose provider-specific options.
   # Example for VirtualBox:
   #
-  # config.vm.provider "virtualbox" do |vb|
-  #   # Display the VirtualBox GUI when booting the machine
-  #   vb.gui = true
-  #
-  #   # Customize the amount of memory on the VM:
-  #   vb.memory = "1024"
-  # end
+  config.vm.provider "virtualbox" do |vb|
+    # Display the VirtualBox GUI when booting the machine
+    vb.gui = true
+
+    # Customize the amount of memory on the VM:
+    vb.memory = "2048"
+  end
   #
   # View the documentation for the provider you are using for more
   # information on available options.
@@ -63,8 +63,30 @@
   # Enable provisioning with a shell script. Additional provisioners such as
   # Ansible, Chef, Docker, Puppet and Salt are also available. Please see the
   # documentation for more information about their specific syntax and use.
-  # config.vm.provision "shell", inline: <<-SHELL
-  #   apt-get update
-  #   apt-get install -y apache2
-  # SHELL
+  config.vm.provision "shell", inline: <<-SHELL
+    apt-get remove -y docker docker-engine docker.io containerd runc
+
+    apt-get update -y
+
+    apt-get install -y \
+    apt-transport-https \
+    ca-certificates \
+    curl \
+    gnupg \
+    lsb-release
+
+    curl -fsSL https://download.docker.com/linux/ubuntu/gpg | sudo gpg --dearmor -o /usr/share/keyrings/docker-archive-keyring.gpg
+
+    echo \
+  "deb [arch=amd64 signed-by=/usr/share/keyrings/docker-archive-keyring.gpg] https://download.docker.com/linux/ubuntu \
+  $(lsb_release -cs) stable" | sudo tee /etc/apt/sources.list.d/docker.list > /dev/null
+
+   apt-get update -y
+   apt-get install -y docker-ce docker-ce-cli containerd.io
+
+   gpasswd -a vagrant docker
+
+   curl -L "https://github.com/docker/compose/releases/download/1.29.2/docker-compose-$(uname -s)-$(uname -m)" -o /usr/local/bin/docker-compose
+   chmod 755 /usr/local/bin/docker-compose
+  SHELL
 end

仮想マシン作成

vagrant up コマンドで仮想マシンを作成します。

D:\vagrant\ubuntu>vagrant up

vagrant ssh コマンドで仮想マシンにログインします。

D:\vagrant\ubuntu>vagrant ssh

exit でログアウトします。

vagrant@ubuntu-bionic:~$ exit
logout
Connection to 127.0.0.1 closed.

仮想マシンの停止

vagrant halt仮想マシンを停止します。

D:\vagrant\ubuntu>vagrant halt

Docker の動作確認

プロビジョニングが正常に実行されていれば docker コマンドが使用可能になっています。

vagrant@ubuntu-bionic:~$ docker -v
Docker version 19.03.13, build 4484c46d9d

vagrant@ubuntu-bionic:~$ docker-compose -v
docker-compose version 1.29.2, build 5becea4c

vagrant@ubuntu-bionic:~$ docker pull hello-world
Using default tag: latest
latest: Pulling from library/hello-world
b8dfde127a29: Pull complete
Digest: sha256:5122f6204b6a3596e048758cabba3c46b1c937a46b5be6225b835d091b90e46c
Status: Downloaded newer image for hello-world:latest
docker.io/library/hello-world:latest

vagrant@ubuntu-bionic:~$ docker run --rm hello-world

Hello from Docker!
This message shows that your installation appears to be working correctly.

To generate this message, Docker took the following steps:
 1. The Docker client contacted the Docker daemon.
 2. The Docker daemon pulled the "hello-world" image from the Docker Hub.
    (amd64)
 3. The Docker daemon created a new container from that image which runs the
    executable that produces the output you are currently reading.
 4. The Docker daemon streamed that output to the Docker client, which sent it
    to your terminal.

To try something more ambitious, you can run an Ubuntu container with:
 $ docker run -it ubuntu bash

Share images, automate workflows, and more with a free Docker ID:
 https://hub.docker.com/

For more examples and ideas, visit:
 https://docs.docker.com/get-started/

参考サイト

takaya030.hatenablog.com

qiita.com

docs.docker.com

変更履歴

  • 2021-06-26 Docker のインストール手順を更新

Laravel の OAuth クライアントを Lumen に移植した

はじめに

下記の条件で Lumen で使える OAuth クライアントを探して手頃なものが見つからなかったので、過去に Laravel を使っていた時によく使った OAuth クライアントを移植してみました

  • Facade を使わない
  • カスタムの OAuth サービスを登録可能

作成した OAuth クライアント

こちらが今回作成したパッケージです。oriceon/oauth-5-laravel を fork して Lumen 向けに書き換えています
Lumen 6 以降で動作します

github.com

インストールおよび設定

インストール

Lumen のプロジェクトの composer.json に以下の内容を追加

"repositories": [
    {
        "type": "vcs",
        "url": "https://github.com/takaya030/oauth-lumen"
    }
],
"require": {
  "takaya030/oauth-lumen": "dev-master"
}

その後、 composer update でパッケージをインストール

$ composer update

パッケージ登録

下記内容で OAuth サービスプロバイダを作成

app/Providers/OAuthServiveProvider.php

<?php

namespace App\Providers;

/**
 * @author     Dariusz Prz?da <artdarek@gmail.com>
 * @copyright  Copyright (c) 2013
 * @license    http://www.opensource.org/licenses/mit-license.html MIT License
 */

use Illuminate\Support\ServiceProvider;
use Takaya030\OAuth\OAuth;

class OAuthServiceProvider extends ServiceProvider {
    /**
     * Indicates if loading of the provider is deferred.
     *
     * @var bool
     */
    protected $defer = false;
    /**
     * Bootstrap the application events.
     *
     * @return void
     */
    public function boot()
    {
    }
    /**
     * Register the service provider.
     *
     * @return void
     */
    public function register()
    {
        // Register 'oauth'
        $this->app->singleton('oauth', function ($app) {
            // create oAuth instance
            $oauth = new OAuth();

            // return oAuth instance
            return $oauth;
        });
    }
    /**
     * Get the services provided by the provider.
     *
     * @return array
     */
    public function provides()
    {
        return [];
    }
}

boostrap/app.php に OAuth サービスプロバイダを登録

/*
|--------------------------------------------------------------------------
| Register Service Providers
|--------------------------------------------------------------------------
|
| Here we will register all of the application's service providers which
| are used to bind services into the container. Service providers are
| totally optional, so you are not required to uncomment this line.
|
*/

$app->register(App\Providers\OAuthServiceProvider::class);

設定ファイル

プロジェクトのルートに config フォルダを作成。その下に下記内容で oauth-lumen.php を配置する

config/oauth-lumen.php

<?php

return [

    /*
   |--------------------------------------------------------------------------
   | oAuth Config
   |--------------------------------------------------------------------------
   */

    /**
    * Storage
    */
    'storage' => '\\OAuth\\Common\\Storage\\Session',
    //'storage' => '\\Takaya030\\OAuth\\OAuthLumenSession',

    /**
    * Consumers
    */
    'consumers' => [

        'Google' => [
            'client_id'     => '',
            'client_secret' => '',
            'scope'         => [],
        ],

    ]

];

boostrap/app.php の中で config/oauth-lumen.php を読み込むようにする

/*
|--------------------------------------------------------------------------
| Load Custom Config Files
|--------------------------------------------------------------------------
*/

$app->configure('oauth-lumen');

認証情報

config/oauth-lumen.phpconsumers に追加する

    /**
    * Consumers
    */
    'consumers' => [

        'Google' => [
            'client_id'     => 'Your Google client ID',
            'client_secret' => 'Your Google Client Secret',
            'scope'         => ['OAuth2 scope'],
        ],  
    ]

Session Storage の設定

アクセストークンをセッションに保存するための設定
Lumen はデフォルトではセッションが有効になっていないため、下記サイトの手順で有効化する

qiita.com

config/oauth-lumen.phpstorage の設定を下記に変更

    /**
     * Storage
     */
    'storage' => '\\Takaya030\\OAuth\\OAuthLumenSession',

使い方

基本的な使い方

下記のコードで OAuth サービスクラスのオブジェクト が取得可能

$service = app('oauth')->consumer('Google');

オプションで第2引数に認証時にリダイレクト先 URL が指定できる

$service = app('oauth')->consumer('Google', 'http://url.to.redirect.to');

サンプルプログラム

Google

認証情報を config/oauth-lumen.php に追加

'Google' => [
    'client_id'     => 'Your Google client ID',
    'client_secret' => 'Your Google Client Secret',
    'scope'         => ['userinfo_email', 'userinfo_profile'],
],  

コントローラのサンプルコード

<?php

public function loginWithGoogle(Request $request)
{
    // get data from request
    $code = $request->get('code');
    
    // get google service
    $googleService = app('oauth')->consumer('Google');
    
    // check if code is valid
    
    // if code is provided get user data and sign in
    if ( ! is_null($code))
    {
        // This was a callback request from google, get the token
        $token = $googleService->requestAccessToken($code);
        
        // Send a request with it
        $result = json_decode($googleService->request('https://www.googleapis.com/oauth2/v1/userinfo'), true);
        
        $message = 'Your unique Google user id is: ' . $result['id'] . ' and your name is ' . $result['name'];
        echo $message. "<br/>";
        
        //Var_dump
        //display whole array.
        dd($result);
    }
    // if not ask for permission first
    else
    {
        // get googleService authorization
        $url = $googleService->getAuthorizationUri();
        
        // return to google login url
        return redirect((string)$url);
    }
}

カスタムの OAuth サービスの使い方

例として Google サービスDatastore API が使えるよう拡張してみます

OAuth サービスクラスの定義

Google サービスDatastore API を使うとエラーになりますが、原因はサービスクラスにスコープが定義されていないためなので Datastore のスコープを定義したサービスクラスを作成します

app/OAuth/Service/MyGoogle.php

<?php

namespace App\OAuth\Service;

use \OAuth\OAuth2\Service\Google;

class MyGoogle extends Google
{
    const SCOPE_DATASTORE = 'https://www.googleapis.com/auth/datastore';
}

OAuth サービスクラスの登録

作成したサービスクラスをサービスプロバイダで登録します

app/Providers/OAuthServiveProvider.php

<?php

namespace App\Providers;

/**
 * @author     Dariusz Prz?da <artdarek@gmail.com>
 * @copyright  Copyright (c) 2013
 * @license    http://www.opensource.org/licenses/mit-license.html MIT License
 */

use Illuminate\Support\ServiceProvider;
use Takaya030\OAuth\OAuth;

class OAuthServiceProvider extends ServiceProvider {
    /**
     * Indicates if loading of the provider is deferred.
     *
     * @var bool
     */
    protected $defer = false;
    /**
     * Bootstrap the application events.
     *
     * @return void
     */
    public function boot()
    {
    }
    /**
     * Register the service provider.
     *
     * @return void
     */
    public function register()
    {
        // Register 'oauth'
        $this->app->singleton('oauth', function ($app) {
            // create oAuth instance
            $oauth = new OAuth();

            // register custom service
            $oauth->registerService('MyGoogle', \App\OAuth\Service\MyGoogle::class);

            // return oAuth instance
            return $oauth;
        });
    }
    /**
     * Get the services provided by the provider.
     *
     * @return array
     */
    public function provides()
    {
        return [];
    }
}

OAuth サービスの設定追加

config/oauth-lumen.php

<?php

return [

    /*
   |--------------------------------------------------------------------------
   | oAuth Config
   |--------------------------------------------------------------------------
   */

    /**
    * Storage
    */
    //'storage' => '\\OAuth\\Common\\Storage\\Session',
    'storage' => '\\Takaya030\\OAuth\\OAuthLumenSession',

    /**
    * Consumers
    */
    'consumers' => [

        'MyGoogle' => [
            'client_id'     => 'Your Google client ID',
            'client_secret' => 'Your Google Client Secret',
            'scope'         => ['https://www.googleapis.com/auth/datastore'],
        ],

    ]

];

OAuth サービスオブジェクトの取得

下記のコードで Datastore API が使用可能な MyGoogle サービスオブジェクトが取得可能

$service = app('oauth')->consumer('MyGoogle');

参考

github.com

qiita.com

Lumen 8 で APP_KEY を作る

Lumen の artisan コマンドには key:generate が無いので、代わりに APP_KEY を作成する方法についてメモ

検証環境

Windows10 Home Edition
XAMPP 7.4.9

$ php --version
PHP 7.4.9 (cli) (built: Aug  4 2020 11:52:41) ( ZTS Visual C++ 2017 x64 )
Copyright (c) The PHP Group
Zend Engine v3.4.0, Copyright (c) Zend Technologies
    with Zend OPcache v7.4.9, Copyright (c), by Zend Technologies
    with Xdebug v2.8.1, Copyright (c) 2002-2019, by Derick Rethans

$ php artisan --version
Laravel Framework Lumen (8.2.1) (Laravel Components ^8.0)

APP_KEY 作成方法

コマンドラインから下記のコマンドを入力する

$ php -r "require 'vendor/autoload.php'; echo \Illuminate\Support\Str::random(32);"
TNhuSsgqtiH8W7mhP7OUAptueW6KjP0X

備考

str_random を使った方法は現在は使用できない

$ php -r "require 'vendor/autoload.php'; echo str_random(32).PHP_EOL;"
PHP Fatal error:  Uncaught Error: Call to undefined function str_random() in Command line code:1
Stack trace:
#0 {main}
  thrown in Command line code on line 1

Fatal error: Uncaught Error: Call to undefined function str_random() in Command line code on line 1

Error: Call to undefined function str_random() in Command line code on line 1

Call Stack:
    0.2188     359392   1. {main}() Command line code:0

参考

VirtualBox + docker-machine で作成した VM の IP を変更する

docker-machine create で作成した VM (boot2docker) の IP アドレスを変更する手順メモ

検証環境

Windows10 Home Edition
VirtualBox 6.1.10

# Docker Host OS (CoreOS)
$ uname -a
Linux default 4.14.154-boot2docker #1 SMP Thu Nov 14 19:19:08 UTC 2019 x86_64 GNU/Linux

# Docker Toolbox 19.03.1
Docker version 19.03.1, build 74b1e89e8a
docker-machine.exe version 0.16.1, build cce350d7

発生した問題について

Docker Toolbox 18.06.1-ce の環境から 19.03.1 にアップデート後、 docker-machine createVM を作り直したところ VM の IP アドレスが 192.168.99.101 になった。
(VM は 1 台しか動かしていない)
恐らく新しい VM を作るときに古い VM のホストオンリーネットワークアダプタが残っていたのが原因と考えられる。

$ docker-machine.exe ls
NAME      ACTIVE   DRIVER       STATE     URL                         SWARM   DOCKER     ERRORS
default   -        virtualbox   Running   tcp://192.168.99.101:2376           v19.03.5

特に実害はないが、以前の環境では 192.168.99.100 だったので可能ならば戻したい。
合わせて VM を複数作成したときに、各 VM の固定 IP 化も行いたい。
(VM の起動順で IP が変わるのを防ぐため)

解決方法

boot2docker の起動スクリプト作成

VM/var/lib/boot2docker/bootsync.sh に下記内容でスクリプトを作成。

#!/bin/sh

/etc/init.d/services/dhcp stop
ifconfig eth1 192.168.99.100 netmask 255.255.255.0 broadcast 192.168.99.255 up

実行属性を付与

$ sudo chmod 755 /var/lib/boot2docker/bootsync.sh

VM の再起動と TLS 証明書の更新

$ docker-machine restart default
$ docker-machine regenerate-certs default

動作確認

VM の IP アドレスが 192.168.99.100 に変更されたことを確認する。

$ docker-machine.exe ls
NAME      ACTIVE   DRIVER       STATE     URL                         SWARM   DOCKER     ERRORS
default   -        virtualbox   Running   tcp://192.168.99.100:2376           v19.03.5

参考サイト

qiita.com

stackoverflow.com

qiita.com